Pages

Showing posts with label first grade. Show all posts

Thursday, October 31, 2013

Primary Colors and Mondrian-Kindergarten and 1st Grade


This is what my white board looked like for several weeks in September! It was all about the primary colors in 1st Grade and Kindergarten! Let me tell you those kids are blowing my mind with their brain skills! They can recite the Primary colors from here to Sunday and tell you why they are the most important colors on the color wheel! One of the Kindergarten teachers told me the other day that she has heard her students talking about and using what we have studying in art class about color theory! ( we are now mixing the secondaries, we are finishing up orange and Warm colors and will be moving on to purple and green with cool colors starting tomorrow.


To start we looked at Mondrian's painting, Boogie Woogie Broadway. We discussed the colors, shapes and lines we saw. We even watched a video clip I found on You Tube where an animator created a 3-D animation based on the painting. The kid's loved it!


1st Grade proceeded by painting their square paper in using rectangles and squares using only the Primary Colors. 


We used the tempera paint cakes for this.


My Kinders got Primary colored construction paper that I cut into medium size rectangles and I demonstrated how to cut them into squares and rectangles of many sizes. They glued their shapes down onto their backgrounds. This was to reinforce their cutting and gluing skills.  They got black paper strips that they were able to cut to whatever size they wished when we added the black horizontal and vertical lines.


First grade stamped their horizontal and vertical lines onto their abstarcts using black tempera paint and cardboard scraps.


Some of these pictures have a reflection on them because they are part of an amazingly beautiful display in the front hallway at school.


We have moved into the Secondary colors in K-2 can't wait to show you what they have been doing!  I will take pictures and share soon! 3d grade is finishing up some patterned leaves that they had to write reflections on today, 4th is creating some abstract art from realistic beginnings and 5th grade is working with Forms and Visual texture.  Will share soon! I'm so proud of the kids and how hard they are working this year!

Well, it's Halloween here in N.J. The first one the kids in these parts have been able to celebrate in 2 years!!! No blizzard or hurricane this year! YEAH!!! I'm off to go watch the original Halloween and The Shining with my daughter! Trick or Treat!!!

Hope everyone has a wonderful weekend and takes time to relax and re-charge!
                                                       Mrs. "C"


Saturday, May 11, 2013

Birds, Birdhouses & First Grade


I love all the colors and textures in this picture!


One of my first grades thought they were helping me during clean up by dumping all the pom-poms and feathers together in the box I had been storing the bags in!  "Oh well!"  I remarked that it looked like a soft, feathery ball pit!  They all wanted to run their hands through it!  I used the opportunity to review tactile and implied texture!  They all got a chance to put their hands in and feel for the textures and see if they could sense the different size pom-poms.  (you can't really tell by the photo but the box huge!) 


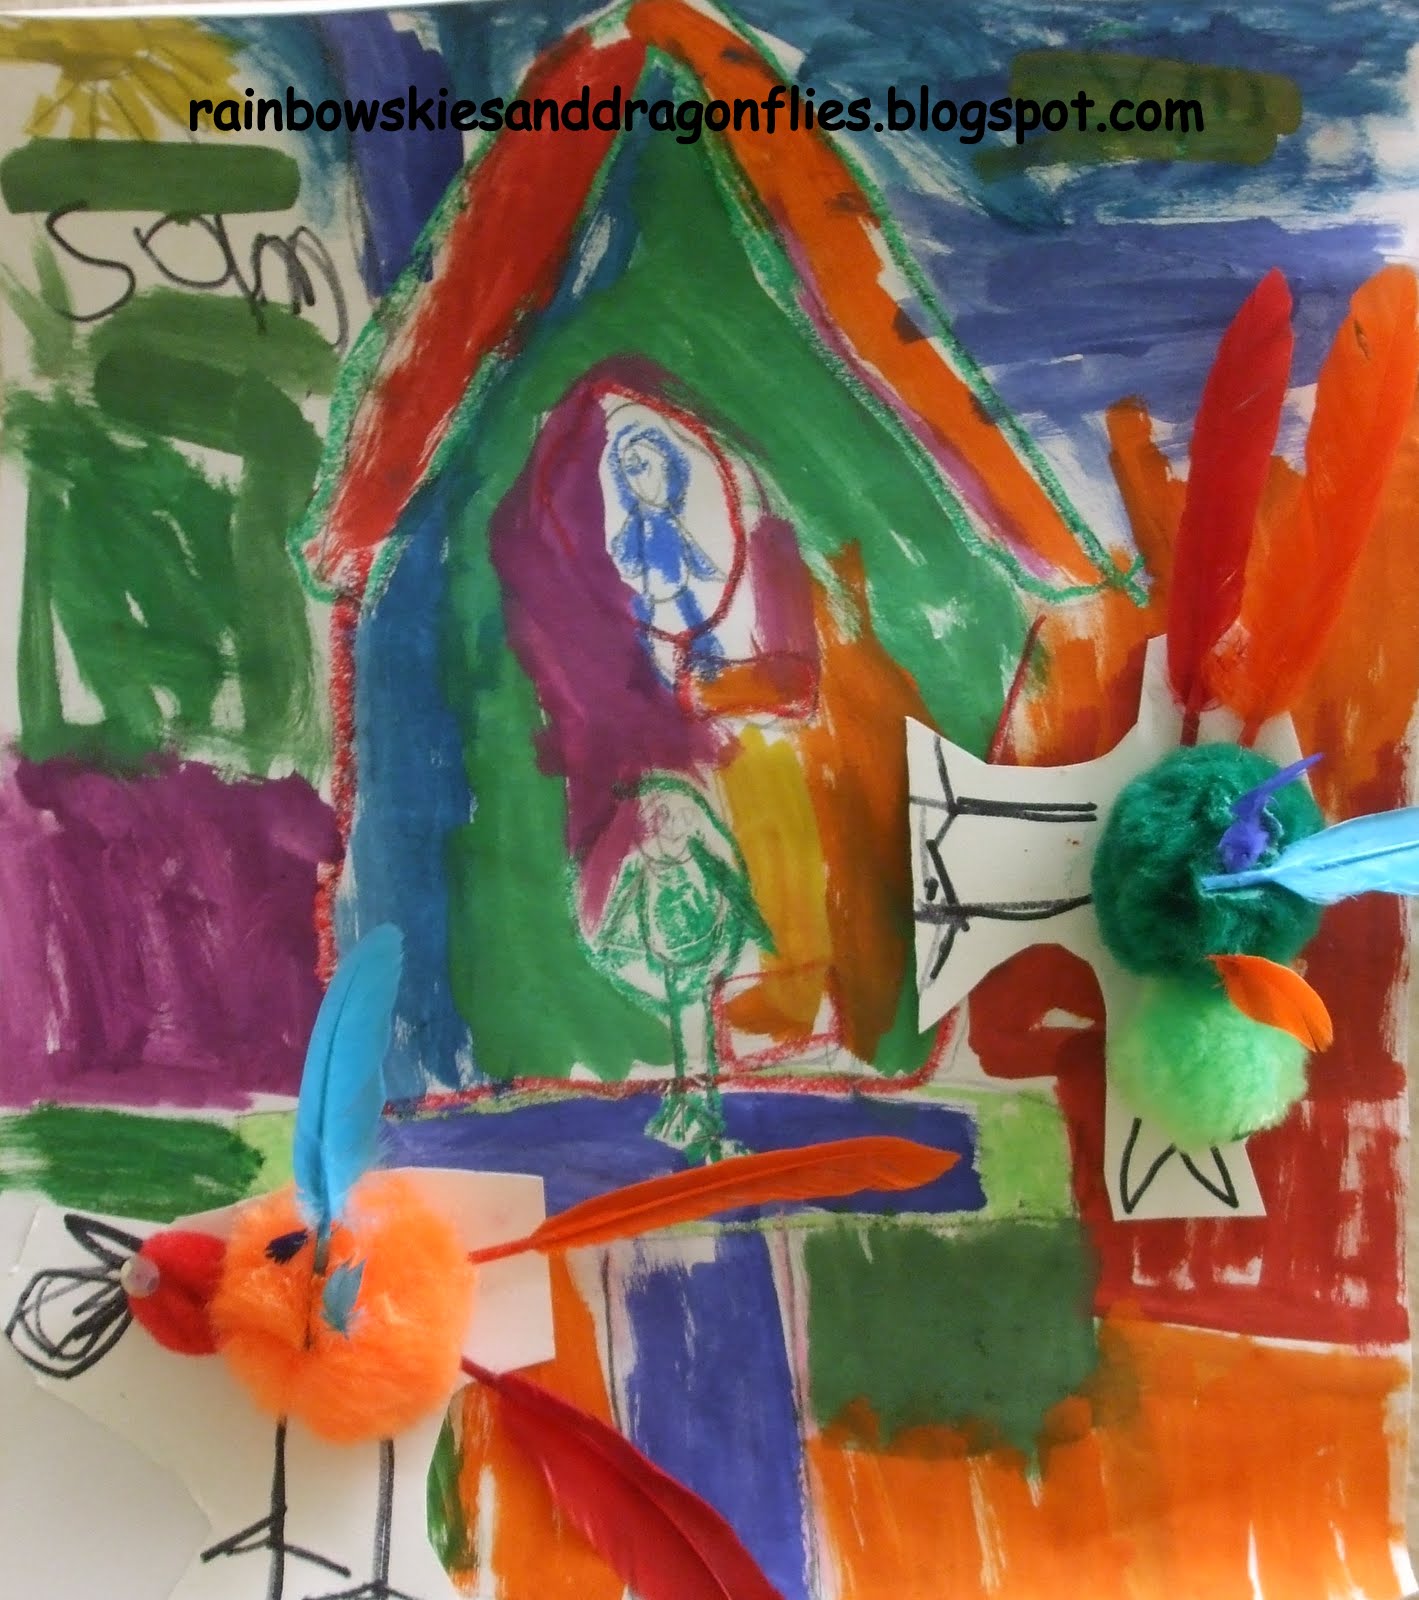
The first grades recently finished painting and creating birds and bird houses.  They loved this lesson!  I think creating their birds was their favorite part!  I did this lesson two years ago with my second grades.  I was inspired by the cute bird house paintings from Deep Space Sparkle.  I decided to revisit the lesson  with my first grades this year.  We reviewed drawing with shapes to design and draw their bird houses. Demonstrating different ways they could combine shapes to create different style bird houses.  I also drew up a step by step drawing sheet they could keep in front of them to look at while they were drawing if needed.


This lesson took us three 40 minute classes to complete.
The first class the students drew and painted their bird houses.
The second class the kids created their birds.


Everyone made two birds.  I gave each student two pieces of oak tag cut about 5in x 5in.  I demonstrated how to glue together the pom-poms and feathers to make their birds bodies.  The ends of the feathers (quills) had to be cut off in order to get the feathers to stay glued on.  After many a flying quill, I had them hold the feathers over the garbage cans in the room when they trimmed them!  They literally shot across the table and onto the floor every time they cut one!  I was starting to worry we were going to have a flying quill and eyeball disaster!  I showed the kids how to hold the feather down into the garbage can when they cut them so it shot/fell into the can and not into their neighbors eyes! 


The third class I had the kids draw the beaks and legs, add some eyes with sequins, cut their birds out and glue them into their bird house paintings!  Any student that needed to finish their birdhouses, start their houses or make their birds did so that class.  Somehow we all got caught up and finished! 


The bird houses are proudly displayed outside their classrooms marking that Spring has finally come! One of the first grade teachers used their pictures as a prompt for a writing piece!  (yeah!)  They all wrote a little story or poem about their birds and birdhouse!  I will have to remember to take photos next week and update with the photos!  The teacher was hanging them up Friday after school! 


On a final note, I was gifted this enormous bag of rubber stamps and stickers this week!


One of my colleagues daughter is a professional organizer and these are from a house she just helped clean up and organize!  I can't wait to go through the bags!

Hope everyone out their has a wonderful weekend and a beautiful Mother's Day on Sunday!
Looks like rain today, but thats okay because we really need it here!

Mrs. C  :)

Saturday, February 23, 2013

1st Grade Owls - Pattern & Texture


My first grades just finished up some really cute owls.  The inspiration came from some cute patterned owls from The Elementary Art Room.  This lesson covered several things...  We reviewed drawing with shapes to create the owls, they added patterns to the bodies, then learned about visual and tactile texture and incorporated them into their backgrounds.  This lesson took us three 40 minute classes to complete.  During the first class the kids drew their owls.  I demonstrated several ways to draw their owls and discussed patterns using lines, shapes and colors.   The students drew them out in pencil, outlined them with black marker and added their patterns with construction paper crayons.

In the second class I discussed visual and tactile texture with my first graders.  I showed them how to use our rubbing plates to create a visual texture in their skies.  Rubbing plates are always a fan favorite!  I gave them Crayola Color Sticks to do their rubbings.  I purchased a class pack for this school year and had not used them yet.  They are excellant for rubbings!  The colors are bright, they go on easily without a lot of pressure and best of all did not have to peel a thousand wrappers off of them! 

To create the bark texture in their trees I had the students draw into their paint with the opposite end of their paint brush while the paint was still wet.  They loved the process and it made a nice tactile texture when the paint was dry.  

In our third class the kids glued on their owls, had a chance to add some green leaves (if they wanted to) with some painted paper scraps and students who were behind for one reason or another got a chance to catch up.  


The children loved their finished owls and couldn't wait to take them home! 


Friday, January 11, 2013

Heart Prints - K, 1st and 2nd Grades


My K-2 art room has been printing up a storm this week in anticipation of our school's yearly celebration of Kindness and Justice Week!  Every January during the week of Martin Luther King's birthday our school has what is called our "Kindness and Justice Week Celebration".

Each year a different book is chosen that shares a lesson in kindness and all of the school's activities during the week center around the book and it's message of kindness. This years book is...


 It was the perfect time to try out this idea for making heart stamps out of recycled cardboard I found on Pinterest.  


All of the classes started by painting a colorful background using watercolors.  


I spent an entire PLC meeting (multi-tasking people!) and evening rolling, folding and taping over 30 cardboard hearts!  I found that if you rolled the cardboard around a large glue stick or a marker it was much easier on your hands!  Although, I do think that if I had octopus arms it would have come in handy a few times when I was holding and taping! 


SUCCESS!

I made the hearts in various sizes and designs.  I made sure that on one side of the stamp all of the edges were as close to flush as possible so the kids could get a good print.  Even if it was slightly off, after they started stamping with the paint the edges mushed down slightly and they were all getting good print images.


Each stamp was 3-4 inches tall so they were chunky and easy to hold and stamp with.


Before the children made their prints, I gave them some materials (tissue paper circles I cut and cut up pieces of last years painting place mats) to cut into shapes and add a little bit of collage to their paintings first.


I poured purple and blue paint onto paper plates that our PTO donated to me last spring.  They were leftover from our school's Senior brunch.  It made for a very easy clean up when we were done stamping at the end of the day!  If the plate got a little soggy, I just put another one underneath it.  I started with two plates together for stability.  They actually held up really well.  I think they were more of a heavy weight plate, not the cheapo kind.


I demonstrated to the children how to stamp with our cool heart stamps to create their prints before I let them use them. 


Let the stamping begin!


The kids loved using the heart stamps!


They thought it was a very creative idea for recycling cardboard.


 Some said, "You come up with the coolest ideas Mrs.C!"
I told them "I found the idea on the computer."


When the kids were done printing, they carried their masterpieces to the drying rack. 


Next week I will be hanging them up around school and on our front hallway bulletin board.
I will post some of the finished pieces next week.  I meant to take some pictures before I left school today but I was busy looking for my desk...


It was buried under many projects I had taken off the drying rack and I spent some time organizing and putting them away after school!

Thus, I forgot that I wanted to photo some things...

There's always next week! 

Have a great weekend!
Mrs.C :)