Pages

Tuesday, July 22, 2014

Flower Prints


I am playing around with Eco-Dying/Printmaking techniques this week! The watercolory prints above are actually from real flowers right out of the pots on my deck/porch! 
One of the techniques that India Flint describes in her book, Eco Colour-Botanical Dyes for Beautiful Textiles, is one she has named, " Hapa-Zome" which is japanese for " leaf-dye ".


Simply, you choose some blooms and see what happens! 
I used 100% cotton muslin but this would work just as well on paper...
I grabbed a couple of test pieces of fabric, two ziploc bags, a small tack hammer and a handful of assorted flowers and leaves...

1. You put the larger ziploc or piece of plastic wrap under the fabric. ( this way the color stays in the fabric better, I used paper towel to start and a lot of color was being absorbed by the paper towel)

2. Place your piece of fabric/paper on top, laying it out flat. 
                                                       
3. Pick a flower that you want to print, lay it on top of the fabric/paper.
                                       
4. Place the second ziploc bag ( a smaller one) over top of the flower/leaf you are going to print. ( plastic wrap will not work for this as you are going to beating the flower with the hammer gently and the wrap will rip)

5. Using your tack hammer/rubber mallet gently beat all over the flower/leaf. The color from the flower/leaf will print into the fabric! 

Now, India Flint recommends doing this gently, as not to beat the flower/leaf into the fabric but, through much experimenting I found that it was difficult not to have smushed flowers in your fabric! The pieces that were not easily removed I let dry and I could very easily rub them off.
Some flowers/leaves worked better than others so it was important to practice different ones first!
Darker colors print the best, blues, purples, oranges... petunias, marigolds, geraniums and begonias printed really well. 
Some flowers I thought would look great either didn't really print or instead of the flower color I got brown!   


                                These are geranium flowers ( two colors ) and begonia leaves.                           


As the prints dried the colors continued to spread resulting in a watercolor effect... 


                  I started this one but my daughter finished it up choosing and printing the flowers...
begonia leaves, geranium flowers, begonia flowers and marigolds...     


This was my first test the other day, I quilted it after it was dry...
              The purple African Daisies turned brownish after the color dried... the rest is marigold, petunia, begonia and a coleus leaf.  I'm taking some of the stitching out of the leaf because it is lost in the marigolds and daisy.


Once the pieces dried I heat set the colors with an iron... curious to see how the color stays...
Since it is natural color it will fade over time ( how much time remains to be seen...) and if left in the sun or washed harshly...  supposed to leave color to set for a long time before hand washing gently if it's a piece of clothing. 

Still working on Eco-Print experiments... prints getting better... waiting for a couple of supplies I ordered... hopefully they are the ticket to the prints I am trying to achieve! :)


Friday, July 18, 2014

Printing Queen Anne's Lace...


I have started to print different flowers/plants from my garden onto pieces of canvas... my favorite by far... Queen Anne's Lace!  The spikey pieces, the random, free form shapes from the flower head, the delicate lacy feel of the leaves... love, love, love!

I have been working on a new bag to carry everyday... I have been using a smallish SAK brand crochet bag for a over a year now and felt it was time for a change! Having searched far and wide for something that felt like me, with no success or the willingness to spend lots of $$$ I decided to make one myself...  :)


How in love am I with this bag you say?  More than you can imagine! I started it a few weeks ago... the body of the bag is recycled jeans ( save your old jeans people!) I made a simple bucket bag, two rectangles, sew the side seams, bottom, sew the bottom points on an angle to create the flat bottom. 


Made a lining from some batik fabric I purchased a few weeks a go... making sure to add a couple of pockets inside.  It needs another larger pocket on the other side inside and a zipper at the top. That's today's mission, among other things, laundry, dishes, Costco, market, etc... At first I was going to create a band at the top using the lining fabric, but wasn't loving it. So it sat on my ironing board/workstation for a few days while I stared at it from time to time trying to figure out what to do with it! 


I ended up ripping the waistband off a pair of my daughter's old jeans that were too small for her. They were the perfect size for the top of the bag! The bottom of the loops needed to be disconnected and re-attached after the band was sewn on...


I had two belts that came with pants I bought at one time... never used the belts... I measured and cut them to use for the tote handles. After cutting them I stay stitched the edges so the belts didn't unravel while I was working with them!


The handles are machine sewn securely in place and the band was eased over the edge and pinned in place.  I machine sewed what I could, mostly the top edge, but not over the belt loops as they were too thick! 


I hand stitched the bottom of the belt band, the spaces behind the belt loops and the bottoms of the belt loops in place. It was better but still lacking something... I stared at it some more during the week...


Tuesday while putzing around I decided to try printing some plants...  the Queen Anne's Lace was the most successful...


I used a sponge brush and dabbed the color onto the flower... laid the pieces one at a time onto the cotton canvas and pressed them into place.  I placed a padding of paper towel over the top so when I pressed the extra paint that squished through the flower ended up on the paper towel nd not me!  I liked that I could use what ever parts of the flowers I wanted and create my own arrangement...


This one looked the best on the my bag. I added some embroidery "doodling" in the corners, stitched around the edge and fringed the sides.  Once it was pinned in place I hand sewed the entire piece to the front of the bag. I added some tiny + stitches to the center to hold it place so the center didn't sag over time. (If you look close you can see them)


I added a scarf I had to the belt loops and TAH-DAH!!! Even my teenage daughter approved, " It's way cute Mom. I would use it.", she said  :)  


I finished the crochet edge on the Shibori scarf... it helped to make it a little longer and usable.


Two different shawls going on at the same time... I'm going back and forth between the two... when I get bored with one I move to the other... they're easily stuffed into my new bag for crocheting on the run! My Eco-Colour book by India Flint came yesterday and I am reading through it now! I am going to try some plant bundling this weekend and see what happens. The bundles need to sit for a few days to a week to continue to process after they are steamed ( the longer the better it seems...) so more on these sometime next week. 

Everyone have a beautiful weekend! The weather has turned cool and comfy here! It;s been 57 degrees F overnight and around 80 degrees F during the day. Perfect! It can stay like this for the rest of the summer for all I care! 
Mrs."C"  :)


Tuesday, July 15, 2014

Shibori Scarf and Crochet...


While I am waiting for my Eco-Dying book to come I have been deciding on what to do with my favorite pieces from my Shibori tests I created last week.  I took my favorite, trimmed the fuzzy edges and hand-rolled and hemmed the edges on it. I am now adding some crocheted edgings. The piece of fabric is a little short for a decent scarf so I am adding the edging for some added length. I have a multi-colored cotton that looks really nice with it so far...  


I'm keeping notes so I remember what stitches I am doing and in what order for the other side...
I'll let you know how it turns out! ( this is one of several creative projects i have going now... I'm also hand quilting the lap blanket I pieced the other week and I have a new shawl on my hook and I'm working on a small tote which is almost done but is lacking something to finish it up, I'll figure it out eventually...  :)
                                            Have a great Tuesday!
                                                Mrs."C"  :)


Sunday, July 13, 2014

Eco-Dying Research...


India Flint-Australian fiber Artist


Cloudy Sunday, laundry in the washer, researching my next creative endeavor...  Eco-Dying.

While Googling the subject I came across India Flint. She is an amazing Australian artist! If you are interested in learning more about her and her work you can go to her site www.indiaflint.com. Soooo inspirational! I just ordered her book,  Eco Colour: Botanical Dyes for Beautiful Textiles, from Amazon.


eco-print by India Flint
Eco Print by India Flint
Another amazing fiber artist is, Lotta Helleberg.


Lotta Helleberg- Eco Fiber Artist

I have followed Lotta's blog, www.lottahelleberg.com for a while now. I was immediately drawn to her work when I first discovered it on Pinterest.  

Art Book by Lotta Helleberg

I can't wait for my book to come from Amazon! I want to try some Eco-Dying/Prints next!
Here are a couple of links for two Pinterest boards, here and here.

Well, back to the laundry...  :)


Thursday, July 10, 2014

Shibori Practice Results...


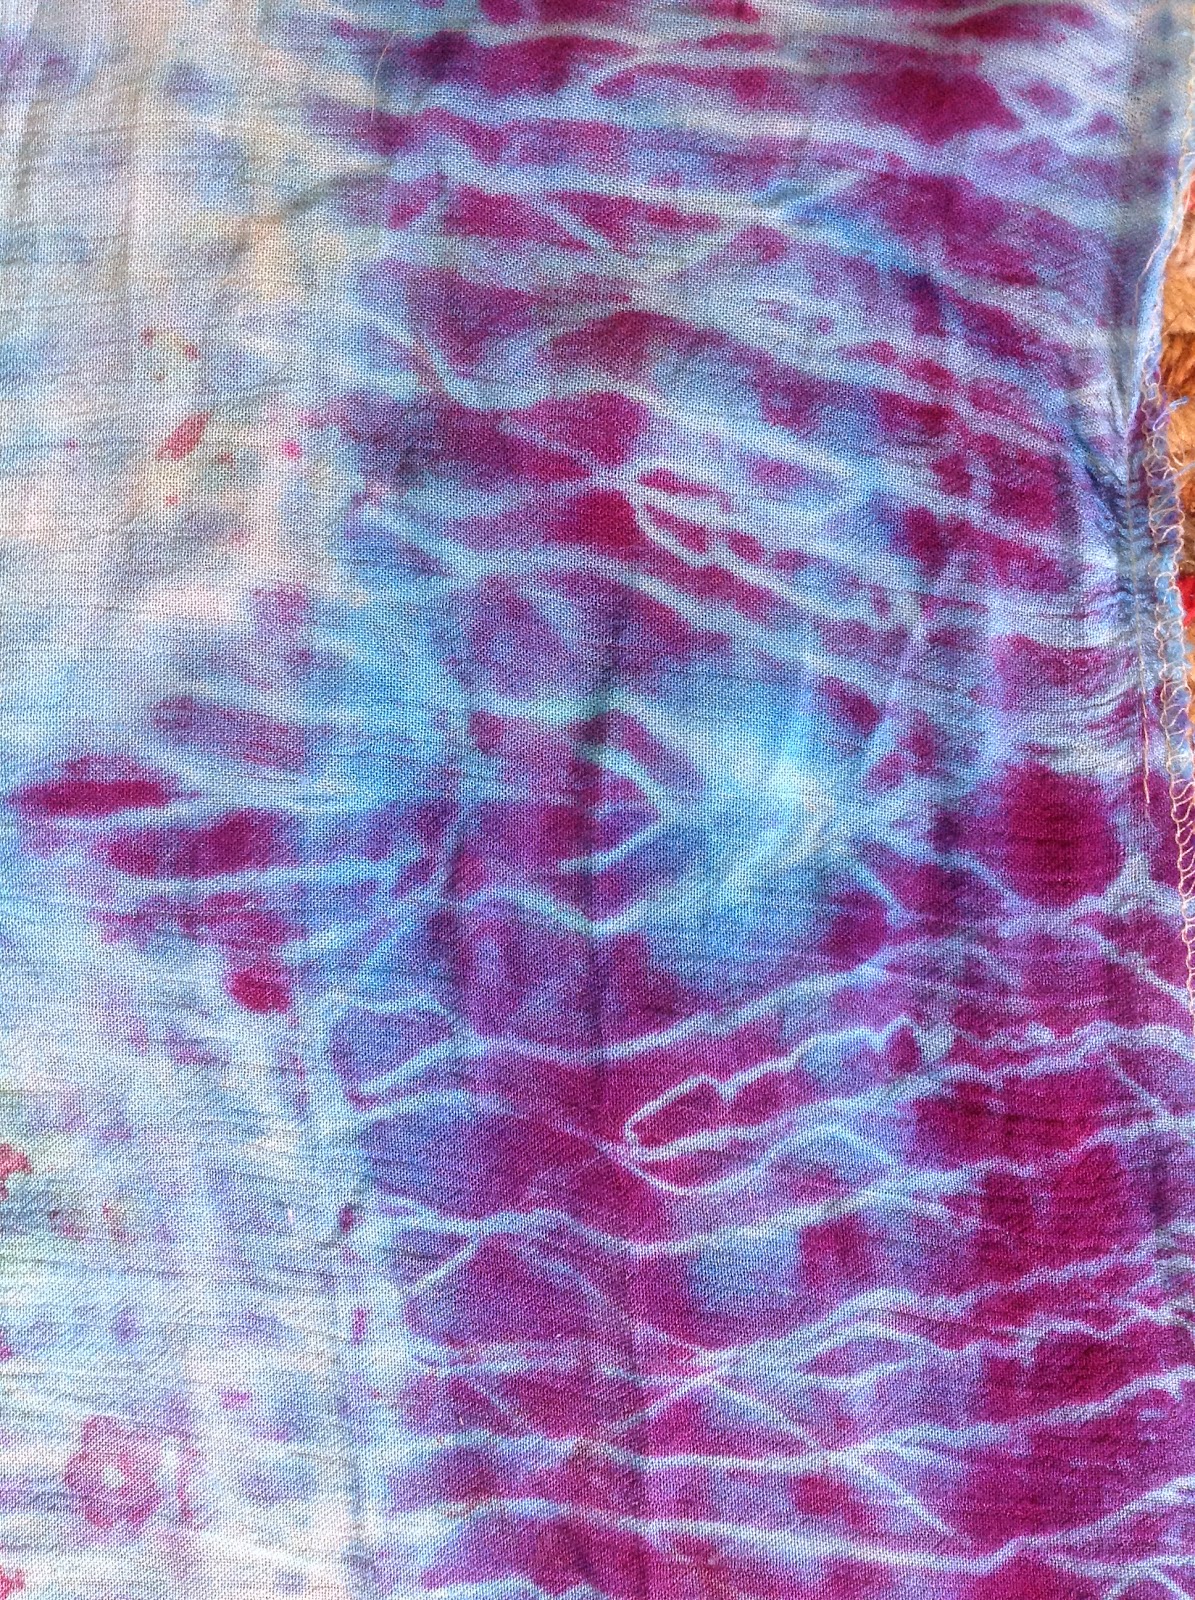
I couldn't wait to take these apart from their wrappings this morning! I was like a little kid opening a present waiting with baited breath to see what was inside! The above piece is hands down my favorite from all of my test pieces!  


It's the one on the bottom wrapped around the block of wood and wrapped ( a lot ) with the green string.


I wrapped it really, really tight...  which gave it these really cool lines that remind me of lightening...


Here are the rest...


Why do cats always insist on sitting on what ever you are working on?  


Ignore the cat tail... this piece came out pretty but not what I was expecting... I had folded it into triangles and clipped it with big butterfly clips and paper clips... if you look close you can see some of the clip outlines in the white...  I still like the coloring in this one...  


The flowers are from the skirt I bleached out... some of the colors would not bleach away no matter how long I left it in the bleach bath...  same with these pieces...


See the orange in this one at the bottom? ( you can also see the flowers that didn't bleach out ) the orange was still on the fabric when I dyed it. In my brain I'm like, well, the orange will turn brownish when the blue covers it...( I'm not an orange fan, sorry all you orange lovers out there...) I forgot that it would stay orange where it resisted the dye... those pieces were pleated, clamped between two pieces of wood and tied very tight. The pattern is not my favorite and with the orange it reminds me of tigers, lol...  


These pieces are my favorites... the patterns and the colors...


Here is the huge cheapo shawl scarf from Wal-Mart... so the blue turned it a shamrock green... 
Because it is sooo big I wrapped it around a large block of wood and tied it up.  I'm calling it a work in progress because its lacking something...  


There are few small areas where some red got on it and it gave it some great color value... I may be re-wrapping it tomorrow and putting some red into it...  right now it's way too much shamrock green for me... needs a little variety... we'll re-visit this one...


All in all, it was a great experiment.  I am going to order some Indigo Shibori dye and pick up some nice cotton.  I want to make up some scarves. I think the wrapped and bound pieces were the most successful.  I want to try some different clamped pieces, maybe stitch resists too...
More experimenting on the way...  :)


Wednesday, July 9, 2014

Shibori, Netflix, Cookies and Rain...


As my son so politely put it, I have entered the 21st century having finally signed up for a Netflix account... just never got around to getting one but after being hounded by teenagers I signed up this morning.  My daughter set it up on our Wii in the family room... when she was done watching something I was scrolling around the choices ( way too many choices! ) and found, ready, ( drumroll...)  Twin Peaks! I have been watching it all afternoon as I worked around the house today! I forgot how kooky this show was!


I spent the time it took to watch the pilot for Twin Peaks ripping out the seams on a skirt that I never wore. The colors were really, really bright until I bleached it out yesterday...


I then got up and made a double batch of chocolate chip cookies.  While I was waiting for the cookies to bake I was walking around the kitchen tying up these...


The pieces of the skirt, a green scarf and my son's white t-shirt.  Last night I was wandering around Pinterest and came across some Shibori pins and inspiration hit! 

I had a tye-dye kit I had picked up because my son wanted to tye-dye one of his t-shirts. 

got this in AC Moore
I found some wood scraps in the workroom, grabbed some green string from my stash
and tied up the pieces of the skirt I deconstructed and a green scarf I picked up a few years ago in Wal Mart on the cheap... if the whole thing bombs nothing lost ( never wore the skirt and barely used the scarf) .  


I set up the kitchen table as the dying station as it was pouring rain this afternoon so tye-dying on the deck became a negative. The tied up pieces are all soaking in a soda ash solution.


I used the blue to dye my pieces. I added some red for purple accents on a couple...


Everything is wrapped up in plastic bags to cook for 12-24 hours...  
Tomorrow morning I'll take the pieces apart and see what I get...
I'm impatiently waiting...
Well, back to Twin Peaks...  :) 


Tuesday, July 8, 2014

Quilting...


Some fabrics I bought to make into skirts have become part of a small, simple lap quilt that I pieced yesterday afternoon...  I should still have enough for a skirt from them ( I bought way too much fabric...) . 


It's overcast and humid today... we had a big thunder and lightning storm late last night...
This is what most of New Jersey really looks like... trees, mountains., lakes, farms, beaches, ocean, ... the part that looks like trash is a small portion compared to the rest of it, which is very beautiful... ( when people outside of Jersey think of the state they only picture things like Port of Newark, 


Port of Newark

Paterson, ( this photo actually makes it look not too bad, lol...)

Paterson,NJ

the parkway, etc...) 

ah, the NJ Parkway, where you need to pay tolls every few miles and you need to pay to get on and off, lol... this is what people drive in to go down to the Jersey Shore... that's normal traffic...


Everything is very wet, so no coffee on the back deck this morning ( it's too humid too, yuck! )


My marigolds are loving the heat and humidity and have finally started to fill in...


Not all of my plants are loving our crazy, "it's hot/humid/ it's cold/breezy" weather that we have been having this summer... my large heirloom begonias are slowly biting the dust...  :(   too many crazy weather changes for them... 


Other plants are completely digging our wacky weather! The coleus and fake licorice plant are taking over, which is good because there is only one begonia left in there! 


This begonia is still going strong...  :)


My fuschias are happy as long as I remember to water them every morning! The geraniums are growing like crazy! 


The mountain is lush from all the rain! Everything is so green! 


The weeds are loving all the heat, humidity and rain also! The birdbath and Tigerlilies are being invaded! I had this whole section weeded out! Too hot to go out there and weed today... put that on the list for later this week when the weather turns back to comfortable...


More weeding, trimming to do in back... the Hostas are lost in there... 


Bird feeder down! The bear must have been around again... that won't be going up again for a while now... sorry birds...


These Begonias are super happy! One of the pots fell off the railing the other day in a storm and got smooshed! :(   It's on the mend and looking better... note to self: move the Begonias before big hail storms! We had hail the size of quarters the other day! It was crazy!


Not my porch but this was the same hail storm from 3 July 2014.  It hit my neighborhood a few minutes later...


I hate to break this to her, but I am going to be pulling the quilt out from under her in a minute to work on it...

Hope everyone is having a restful week...  I am...  :)

Mrs."C"  :)