Pages

Showing posts with label second grade. Show all posts

Saturday, January 26, 2013

Monochromatic Colors and 2nd grade


Before the Christmas break all my art classes were working with color.  Last year I taught this lesson with my 5th grades.  I wanted to try it with a different grade levels and compare results.  My 2nd grades were very excited when they saw my example and found out it was their next lesson!  We discussed Monochromatic Colors and showed them how to mix their colors with white a little bit at a time to gradually change their colors and let them loose to start mixing their own colors!

Each table got  some purple, blue and white paint to share.  I gave each student a quarter piece of a paper plate ( I sliced them up on the paper cutter into quarters) .  I showed the kids how to put some white onto their "palette" and slowly mix their colors as they go. After each color mix I had them paint a ring around their white moon.  (sorry I didn't take any pic's to show you how I organized the supplies, like I said it was before Christmas so things were a little hectic!)

Even though their color changes do not go from dark to light I think the lesson was very successful in the sense that they got the chance to experiment and discover with their colors.


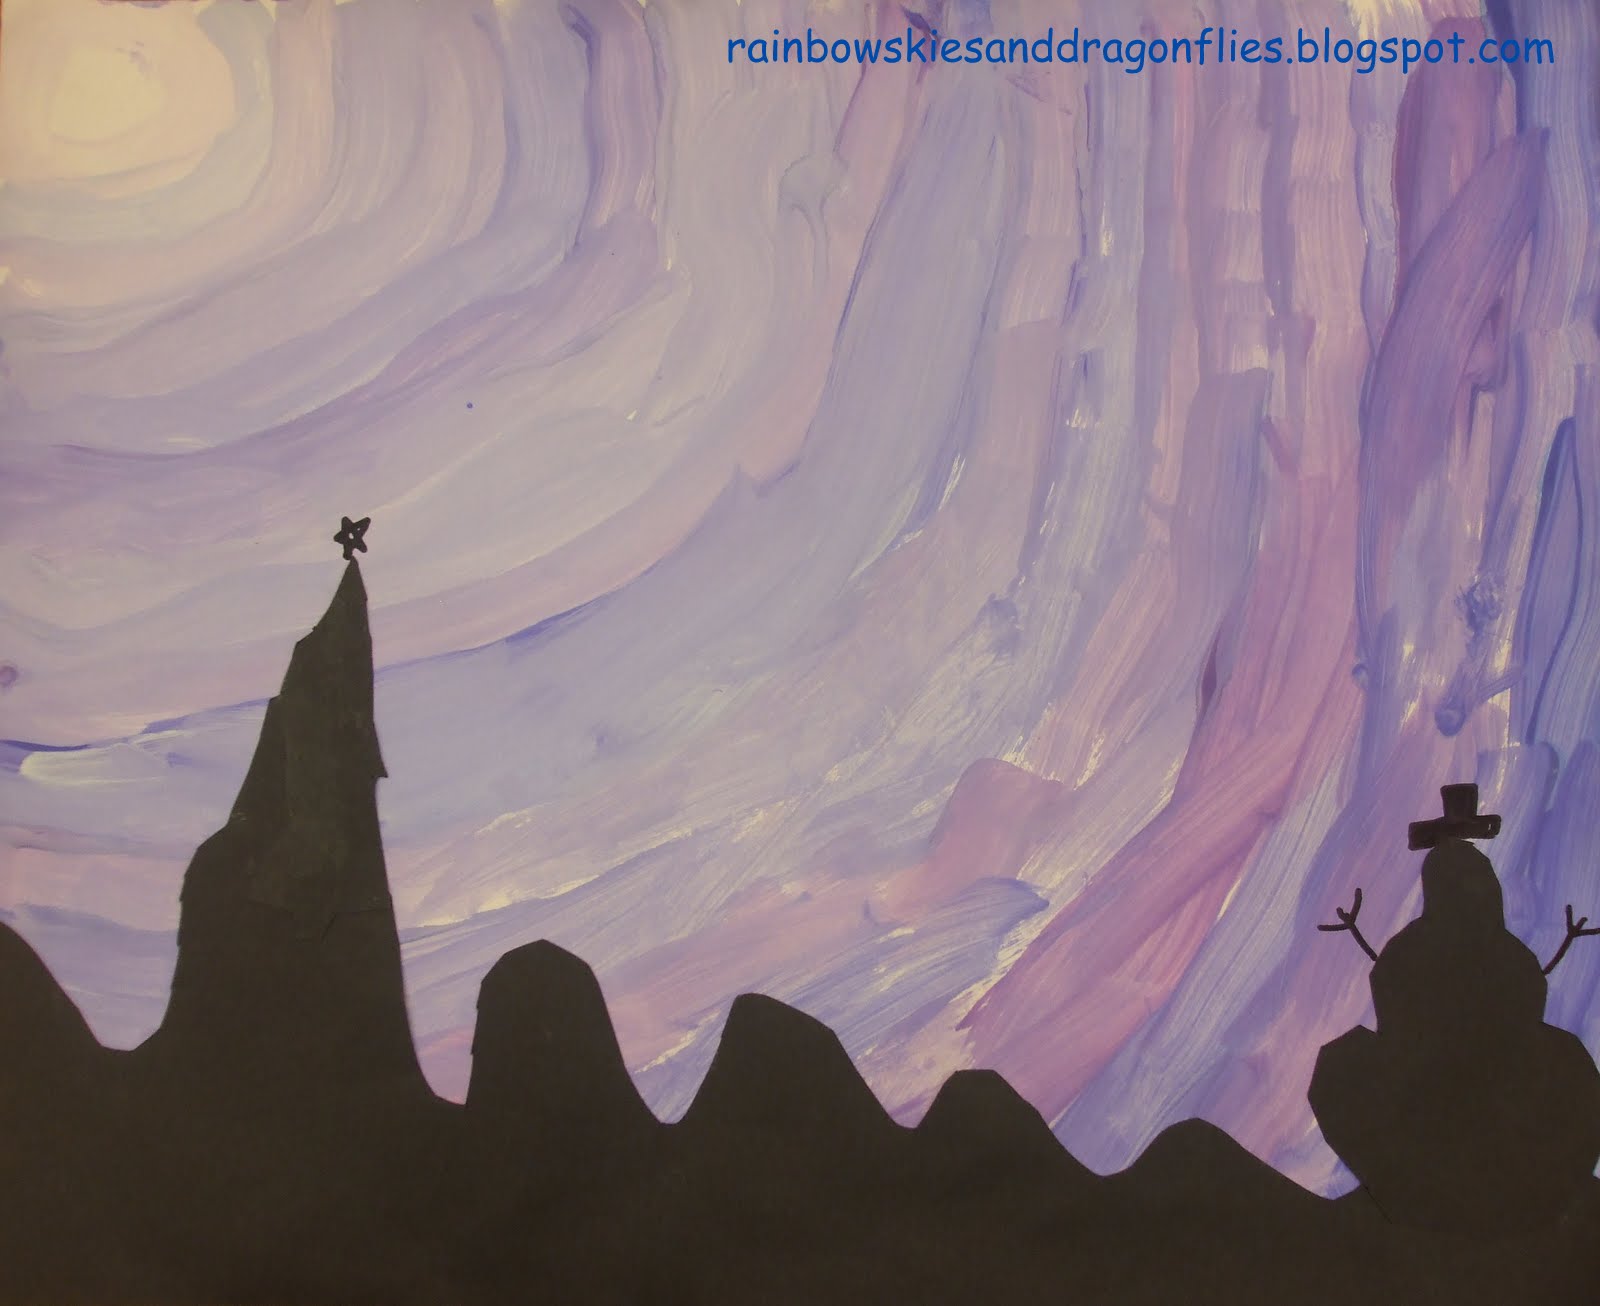
During our second class the students created their winter silhouettes.  Since this was 2nd grade I changed how I would normally show the students how to draw and cut out a silhouette.   I presented them with some examples of a silhouette so they could get an idea of what they are and how they look in real life.

Each one of the kids got a strip of black paper that was the length of the painted background.  I also showed them how to cut the paper longways to create the strip for their ground.  Lastly, how to draw and cut out the other items they were going to place into their scene.  We drew the small details like our snow people's arms in black Sharpie since they were too tiny to cut without amputating them!

Once all the paintings were displayed on the display board in our front hallway, everyone expressed how stunning they were!


When it comes down to it, what I always want my students to get from a lesson more than anything else, is that feeling of Creative Pride.  There was a lot of creative pride with this lesson!  :)

I'm procrastinating, avoiding having to do grades...  700+ and comments for my modified students  due on-line Wednesday by 12AM.  I don't have to give grades to my Kinders, thank God!  I'll get to it before the end of the weekend.  My deadline for myself is to have it done before I sit down to watch Downton Abbey tomorrow night.  I'm obssessd with that show!  Anyone else?


Friday, January 11, 2013

Heart Prints - K, 1st and 2nd Grades


My K-2 art room has been printing up a storm this week in anticipation of our school's yearly celebration of Kindness and Justice Week!  Every January during the week of Martin Luther King's birthday our school has what is called our "Kindness and Justice Week Celebration".

Each year a different book is chosen that shares a lesson in kindness and all of the school's activities during the week center around the book and it's message of kindness. This years book is...


 It was the perfect time to try out this idea for making heart stamps out of recycled cardboard I found on Pinterest.  


All of the classes started by painting a colorful background using watercolors.  


I spent an entire PLC meeting (multi-tasking people!) and evening rolling, folding and taping over 30 cardboard hearts!  I found that if you rolled the cardboard around a large glue stick or a marker it was much easier on your hands!  Although, I do think that if I had octopus arms it would have come in handy a few times when I was holding and taping! 


SUCCESS!

I made the hearts in various sizes and designs.  I made sure that on one side of the stamp all of the edges were as close to flush as possible so the kids could get a good print.  Even if it was slightly off, after they started stamping with the paint the edges mushed down slightly and they were all getting good print images.


Each stamp was 3-4 inches tall so they were chunky and easy to hold and stamp with.


Before the children made their prints, I gave them some materials (tissue paper circles I cut and cut up pieces of last years painting place mats) to cut into shapes and add a little bit of collage to their paintings first.


I poured purple and blue paint onto paper plates that our PTO donated to me last spring.  They were leftover from our school's Senior brunch.  It made for a very easy clean up when we were done stamping at the end of the day!  If the plate got a little soggy, I just put another one underneath it.  I started with two plates together for stability.  They actually held up really well.  I think they were more of a heavy weight plate, not the cheapo kind.


I demonstrated to the children how to stamp with our cool heart stamps to create their prints before I let them use them. 


Let the stamping begin!


The kids loved using the heart stamps!


They thought it was a very creative idea for recycling cardboard.


 Some said, "You come up with the coolest ideas Mrs.C!"
I told them "I found the idea on the computer."


When the kids were done printing, they carried their masterpieces to the drying rack. 


Next week I will be hanging them up around school and on our front hallway bulletin board.
I will post some of the finished pieces next week.  I meant to take some pictures before I left school today but I was busy looking for my desk...


It was buried under many projects I had taken off the drying rack and I spent some time organizing and putting them away after school!

Thus, I forgot that I wanted to photo some things...

There's always next week! 

Have a great weekend!
Mrs.C :)


Monday, April 2, 2012

Ready for the 2nd Grade Play


My second graders have finished their sea creatures and their ocean mural for their play in music!  They will be performing for the kindergarten, first graders and their families at the end of April.  Here are some photos of their finished ocean mural and some more of their sea creatures!  Everyone who passes the Art/Music room stops in to admire their mural!  They are so proud of it!  They did a great job!


The Music Teacher is going to put blue paper behind it for the paly so everything blends.


Left side close - up

Right side close - up

Love,love the fish with the big mouth chasing the little fish!!!

The kids made all these little red crabs for the ocean floor!

Another Close - Up

Baby Jelly Fish!
More Fish


Life on the ocean floor

Close - Up of the ocean floor.  Printed with bubble wrap!


Center Close - Up


Tuesday, March 20, 2012

Getting Ready for the 2nd Grade Musical


Working on the ocean back drop for 2nd grades play in music
Every spring our second graders do a musical play with our music teacher.  This year the theme is the ocean.  We have started to get their props and backdrops ready to be used in their dress rehearsals.  Each class is helping to paint and create the back drop.  I had been thinking for a while how I wanted them to paint the ocean.  At first, I was going to have them each paint some wavy lines to represent the water.  However, after seeing Phyl's post about how her third graders painted in the style of Klee, I knew then it was the way I wanted to go with the water!  I began by creating a grid on pink bulletin board paper (it was the heaviest and better to paint on than the other colors).  By using the blocks each child had a defined space to paint in.  I sent the students back to paint in groups of about six to eight depending on the class size.  I let them choose any of the five colors to paint in their blocks and I encouraged them to blend the colors in their block.  Each student painted three blocks.  The photograph shows the work of three classes (I have seven second grades).  Once we get all the blocks painted I will then add a sandy bottom and have the students help make seaweed along with sea creatures in the ocean.  I will post the finished backdrop in a couple of weeks when it is complete.


Each student is creating their own sea creature that they will be holding as a prop during their play.  These just need the tongue depressor added so they can hold on to them.


Each child started by decorating a piece of oak tag using oil pastel and watercolors.


We let these dry and during the second class the students turned them over and began drawing their sea creature.  I gave them each a packet with directions of what they would need to draw for their sea creature. 


Each student started with the same size circle shape and then started creating by adding the necessary body parts to complete their chosen sea creature.  They then cut, glued and decorated!  Everyone loves their creations and can't wait to show them off at their play next month!


A few more of their sea creatures!


I will post more sea creatures as the students complete them! The students and I are  looking forward to seeing the completed mural!