Pages

Thursday, June 28, 2012

Beautiful Skies & Crochet


 This was the view from my front porch the other morning...
Looks like sunset but it was actually around 7:00 AM.


I live on the side of a mountain so we have great views... 
Clearing the snow off my VERY long driveway is another story.


We live on the shady side of the mountain so we are in the shade for most of the day.  The sun does not really hit my porch fully until around 4:30 PM.  You can sit and enjoy the porch for most of the day.  The neighbors across the street on the down side of the mountain have full sun from sun up to sun down with no air flow.


I have been busy crocheting during my free time.  There is an abundance of patterns and ideas out there on the web.  This pretty little flower garland is from Sweet Crocheterie.  The pattern is called Rose Garland Necklace/Bracelet.  I made mine a necklace.  I love how it came out!


I made my flowers blue.  I'm not much of a pink person.
It's longer than it looks.  I smushed it up to get it all in the picture.

This was the first strand,  just the leaves.


I used embroidery floss since I could not find colors I liked in the thin crochet thread.  It worked just fine!  In fact it was much cheaper that way!  It cost under $2.00 to make!  I might add some beads to  it ... needs a little something...


Here's a pattern I have been looking for for quite some time!  It's called African Flower.  I found a pattern I could follow at Wonderful Hands.  She has beautiful flower patterns.  You have to read the descriptions on the pattern pages though...  Some have written/picture tutorials and some are charted patterns.  Both shops are from Etsy.  If you have never been to Etsy, I suggest you go!  There are some really great handmade items and patterns for sale!  Both shops had great customer service and I recommend them both! 


This is a hexagon block, so crocheting the blocks together was a bit of a learning curve for me!  I ripped it out three times before I finally got it right!  Eventually, the blocks will be crocheted together to create a version of this bag.  I found this picture over the winter on Pinterest.  It led me to discover this knitting/crocheting blog.  The blog is in Swedish,  use the translater button she has on the bottom of her blog .


My blocks are much bigger than the ones on Mia.
I won't need as many rows or blocks for my bag.
Don't know if I will add a tassel to the bottom of mine or not.

I use pencil grips on my crochet hooks to pad them.
The metal starts to hurt my hand after a while.


Lastly, I made this crocheted circle shawl last summer.  It was good practice, but I did not like how it looked on me.  I ended up throwing it across the back of an oatmeal colored chair that my cat Sweetie-Pie was always sleeping on.  Now I don't have to keep cleaning up cat hair off the chair!  I just throw her blanket in the wash!  Well, off to make supper and crochet a few more African Flower blocks tonight. Till next week...  (I'm going to start getting some things together for the new school year, so next week is going to be about assessment in the classroom).


Wednesday, June 20, 2012

Happy 1st Day of Summer!

The colors of the flowers are so brilliant against the
surrounding earth tones of the table and chair!


Happy "First Day of Summer!!!!" It feels like it here on the East Coast!  It's hot and humid!  Well, at least my tomato plants will be happy! :)  The top photo are flowers from my garden.  Now that school is out I can concentrate on several projects that I am in the process of working on.  I started some large granny squares for a throw to put on my bed.  I am designing as I go along and figured at this rate I will be done by Christmas!

I'm trying to decide on some flowers for the center of the four granny squares that make up a block.  The book I'm using for my flowers is entitled: 100 Flowers to Knit and Crochet by Lesley Stanfield.  (bought it on Amazon)  Lots of great flower and leaf patterns. 


Maybe the daisy... Also trying the chamomile pattern...
Larger center, smaller petals.


Everything is scattered across my ottoman at the moment.


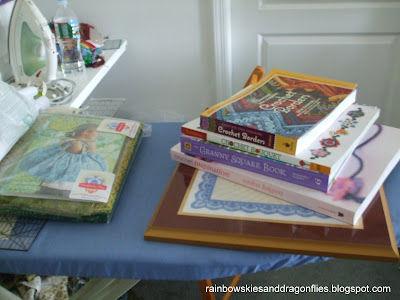
My sewing space.  Books, patterns and fabrics waiting!


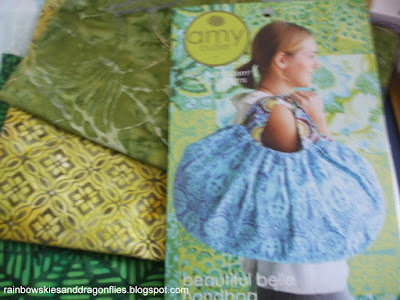
Great batik fabrics!!!  My first try at buying fabric on-line...  I'd rather be able to see and touch it in person but these were a great buy on sale, so I gave them a try.  I purchased them from the Fat Quarter Shop.  They came beautifully packaged and I am very happy with the quality of the fabrics.  I recommend The Fat Quarter Shop if you are going to purchase fabric on-line.


I bought this pattern with the fabric.  Its an Amy Butler handbag pattern, called the Beautiful Belle Handbag.  Love, love Amy Butler designs!  If you love to sew and have never seen her patterns/fabrics, you have to check them out!  I have been holding this pattern on my wish list since Christmas time.  When I saw these fabrics I new that they were the ones for this bag!  The dark green is going to be the lining and the lighter green trellis pattern is going to be the body of the bag.  The medium green is going to be the handles.  I made her Cosmo bag in January.  It's a HUGE tote bag!  I use it to carry all my folders and school stuff back and forth to work.  It's from her book Style Stitches I purchased off Amazon.  (I buy a lot of my books from Amazon, great prices and service!)


Bought these from...  Where else....  Amazon!  They were a birthday present to myself.  Crochet Borders by Edie Eckman, Crochet Bouquet by Suzann Thompson and the Granny Square Book by Margaret Hubert


Love making granny squares!


Just made the best hat for the Fall/Winter! The pattern is from Playin Hooky.  All the patterns are original designs by Liz McQueen.  This one is called the Fishnet Beanie.  Quick and easy to crochet and may very well become Christmas presents for my nieces.

 
No, this is not my mother's room!  I put the pillow on my daughter's bed to photograph.
It's nestled in around her Ugly Dolls, fuzzy pillows and her Hunger Games poster.

Lastly, I am working on the twin to this pillow.  I made this one for my mother for Mother's Day.  She loved it so much that she asked for a second one!  I have 12 of the 18 granny Squares done already.  Now I just need to find what I did with my notes for making the flowers!  Changed the flowers around from one I found in my book, 100 Flowers to Knit and Crochet. It's inspired by this throw.

I had spent a lot of time previous to this pillow project exploring several crochet blogs for inspiration.  Two of my favorites are Attic 24 and The Flower Bed.  I found them while trying tirelessly to find a written, not graphed crochet pattern for a Japanese Flower.  My quest for it started when I saw this Japanese Flower scarf on Pinterest.  It was crocheted by Lucy at Attic 24.  Fell in love with the flower but could not find any patterns for it that were not in Japanese or graphed.  So, I've been working on trying to break down the stiches from some images I found.  I'm close to re-creating the Japanese flower!  But that's for another day...


Saturday, June 16, 2012

Decorating the "cage"


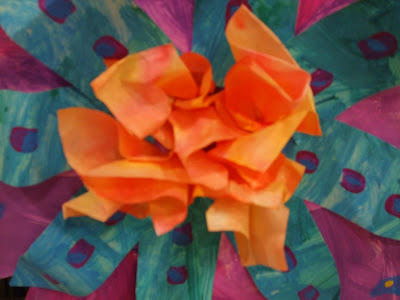
These are are some pic's I saved from back in the beginning of May.  The giant flowers were inspired by the beautiful flowers that were in Painted Paper's May 2nd blog.  Every May our school hosts a Senior Brunch for the seniors in our community.  The students make decorations, place mats, center pieces, cards, etc. for the brunch.  Our PTO moms make and donate all the food, the classes sing songs...  You get the idea!  The Senior Brunch is held in our multipurpose room (gym/auditorium/cafeteria).

In the multi-purpose room are two "Cages".  Long, long ago there were plywood rooms that were the storage/offices of myself and the music teacher when we were on carts (this was about 15 years ago – we were on carts for about six years then).  At one point the fire marshall came in and said they had to come down because they were a fire hazard (personally I always felt the masses of art supplies were a bigger hazard, but whatever!).  Enter the "Cages"! In their place the district installed two metal "Cages".  Mind you, it was still my office and storage at the time and now all of my chaos was easily viewed by all.  The dust that accumulated inside was unbelievable! Eventually the music teacher and I were given a room and released from the confines of our "Cages"!

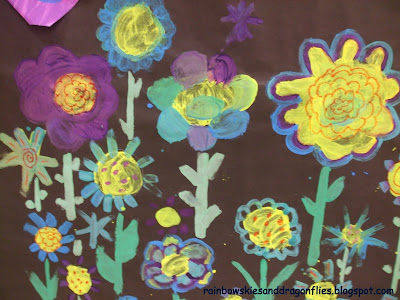
The "Cages" are now storage for many different things, and still are the biggest eyesore in the room!  In order to "Beautify" these "Cages" for the Senior Brunch, I had the students paint giant pieces of oak tag that I turned into flowers and dragonflies.  I had my first graders paint the field of flowers that blended in with the "Cages" to cover the strip at the bottom and "Tah-dah!"  The "Cages" were transformed!

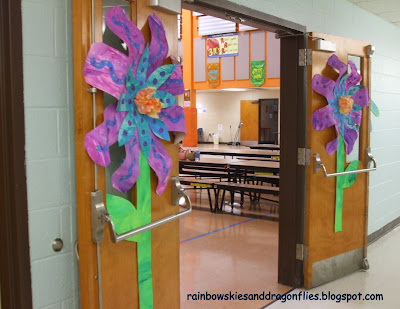
These decorations were such a hit, that they were left up for the rest of the year and are still up.  I placed two other flowers on the doorways into the multipurpose room.  The two first grade teachers that could see them from their room were sad when I took them down. Those are now decorating the front hallway bulletin board for the summer.  My principal loved it so much that she wants me to decorate it for the seasons next year!  Guess that means pumpkins and sunflowers for the Fall!  Hope everyone is enjoying their time off from school, our district finished on Tuesday! :)


The entrance to the mulit-purpose room.


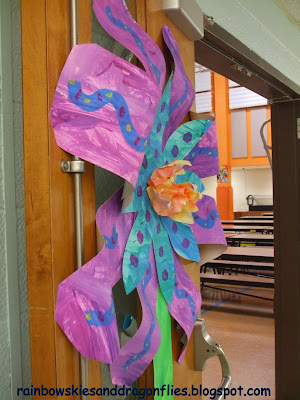
Close-up side view. I popped the petals out because they didn't fit and they looked better that way!

Dragonfly on the wall.  Used duct tape to stick them to the doors.
I was worried they would fall down but they were stuck like glue!


Dragonfly!  The kids kept asking to take him home!  He is going on the walls of the art room next year!

You can see the lovely cage walls behind this side view!


Watercolor bleed on dippity dye paper for the centers.


 First grades painted flowers!  Quick, Simple & Beautiful!


Friday, June 8, 2012

End of the Year Organizing


My school district has exactly 1 1/2 days of school left as I type this post!!!  All day today, everyone has been saying the same thing:  "It doesn't feel like we have only a couple of days left.  It feels like we are going to be back next week to do it all again as always!"  We are getting out earlier than normal this year since we had no snow days.  We always have at least a week of 1/2 days at the end of the year  (make-up days for snow days) but we have had full days up to the end this year. 


These shelves are now empty and the walls are bare. Just took the last things down today.


The stacks of art work that were on my shelves are dwindling down to nothing since I took these pictures a few weeks ago.  All the art work has been returned to the students to take home.  We have been making portfolios and admiring our work for the past week!


This shelf is now completely bare except for two classes that need to get their projects back on Monday.


Both of my desks are now cleaned up and packed. I just need to hand in my plan books,grade books,keys and ID


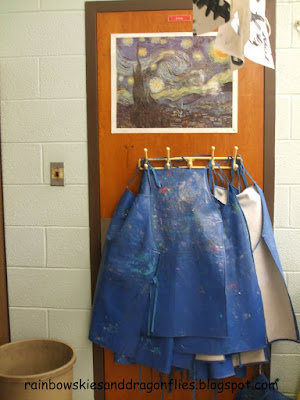
All the smocks are folded and packed away.


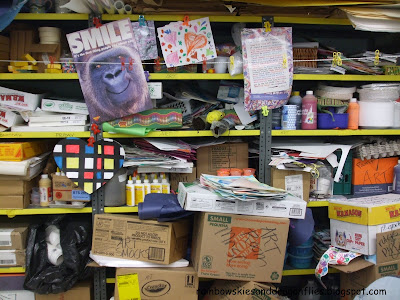
The shelves are organized and things I don't want out are boxed or stored in my closet. This art room is used for a summer care program. It's a great program that is completely staffed by teachers and assistants in our district.


I still have much organizing to do at this school on Monday. Could you tell?


These boxes were loaded with M&M Mars goodies that we all received for Teacher Appreciation Week! They are super sturdy boxes. I had everyone who did not want their box to bring it in for me.I got tons!!!  I am going to cover them with contact paper and use them for markers, crayons, etc... on the tables next year!


I will be posting over the summer, projects that I have saved to blog, projects I am personally working on and lessons I am contemplating for next year.  I organized all of the special subject teachers into a PLC group next year to work on assessment, so I will most likely be blogging about my research on it over the summer seeking input from all of you! Until my next post in the next week or so...


Saturday, June 2, 2012

Salt Watercolor Koi Fish - 3d Grade


I needed a quick project for the end of the year for my third grades.  I saw this lesson for a Koi Fish watercolor on Art Projects For Kids.  (I tried to set up a direct link to the exact page for the lesson but the link won't work.  Go to Art Projects for Kids and type in Koi Fish into the search bar for her site.  It will pop right up.)

I went through the steps with my third graders on how to sketch the Koi Fish "Bird's Eye" view.  They outlined them with Sharpie marker and colored them with crayon.  The following week they painted the water with watercolor and sprinkled salt on top for really cool effects.  Salt watercolor is always a hit!  Quick & Easy!  I let them choose any color for their water since we are on the very last of our watercolors.  One small tip:  If you are going to salt watercolor, don't pick the week when the weather is ungodly hot and humid.  Any salt that falls onto the floor or anywhere else melts from the humidity leaving what looks like little water droplets all over the art room.  As soon as the kids steps on them they track it throughout the room and leave a greasy, slippery mess everywhere!  The kids of course thought it was cool when they realized how easy it made it to slide on the floor!  It was disgusting!  No one cleaned my room that night and the next morning when I entered the room, it was worse!  Had to get the day Custodian to come up and quickly mop the floor!  Of course nothing was drying because of the humidity, so I laid out pathways all over the room with newspaper so the kids didn't break thier necks!  Here are some pictures I snapped quickly before they took them home.  Enjoy!  :)